Showing posts with label mistakes. Show all posts

Monday, December 1, 2014

No Boat From China

Finding a necklace box for my handmade jewelry has been almost as daunting as opening my Etsy business--and probably twice as time consuming.  I allotted 7 months to finding and purchasing the necessary boxes, imagining that it would really only take 3 months.  However, I wanted a good  time cushion in case of unexpected obstacles.  There are always unexpected obstacles, right?

I was actually hitting my marks.  I found a box I loved, a company in China to make it for a reasonable price, and a super-nice company representative in China to work with.  We were on the verge of production when I learned I had no way to get the finished boxes from there to here.  One cannot, it turns out, simply pop a bunch of boxes in the mail in China and expect them to arrive on one's doorstep here in the US.  Such items come by freight, usually ocean, and they enter specific ports in the US.  One must have agents in both countries to marshal the goods through each country's customs, and one must have other helpers--licensed helpers--get your goods onto some sort of in-country transport once they clear US customs. I was explaining all this to my sister, talking about all the months I had put into this enterprise only to watch it fall apart , when she interjected, "You need a Customs agent!"  And indeed I did.  What bugs me is she knew this within seconds of our conversation, and it took me 7 months to figure this out. 

I did actually find an agent, but as my store's opening was imminent I decided I needed a quicker alternative.  "Quicker" being relative here.  So I bought a Sissix Eclips2.  I'm still working on box designs and  materials, but I should have a one or two ready by Christmas.  Whether that will be this year's Christmas or some future year's Christmas is anyone's guess, however.
This is the box I almost purchased.  It would have been customized with sage green and cream colored paper and custom necklace/earrings insert.  My logo would have been hot foiled on top with silver.

Monday, November 3, 2014

Mistake of the Month Mondays: The Stretched Out Necklace

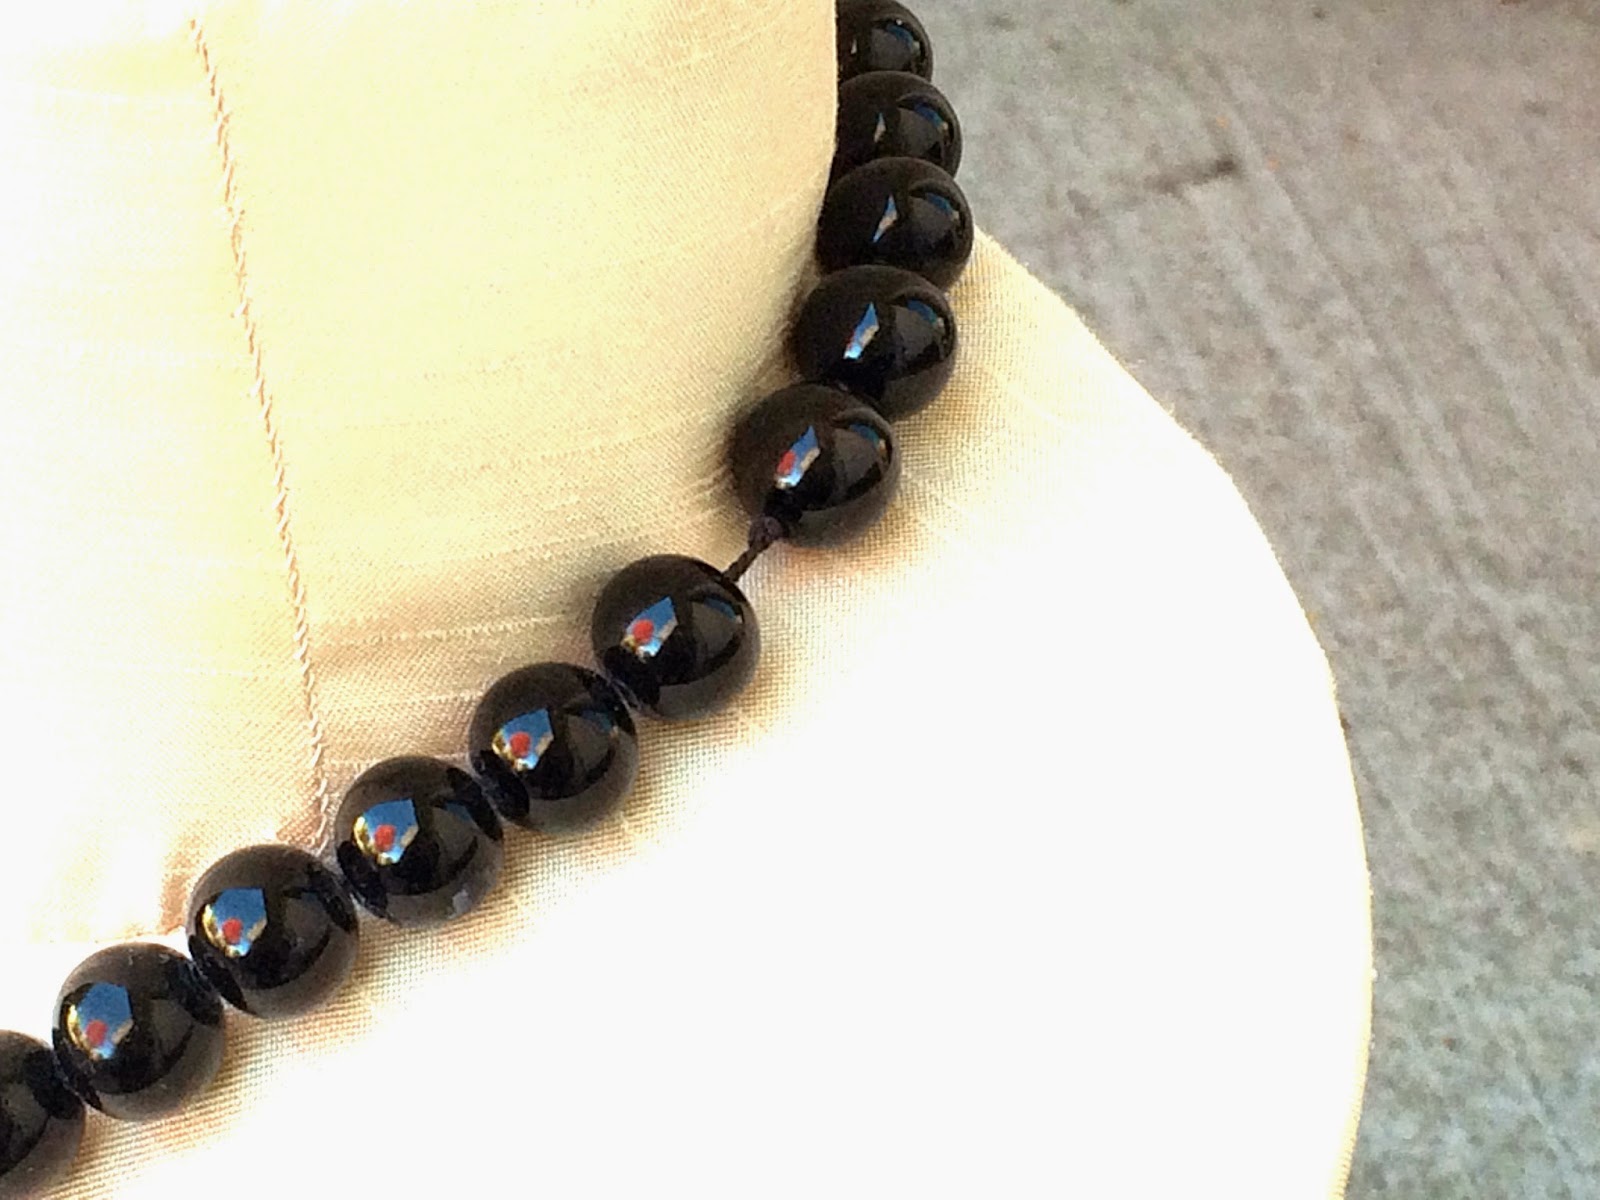
One of the first necklaces I ever made for myself, this started out as a vintage 12.5" chocker that was too small for even my scrawny neck.  To make it functional, I supplemented the onyx with black glass (an unscrupulous vendor told me it was black onyx and I didn't know the difference) and large contemporary onyx.  I hand strung and knotted the beads on double-stranded black silk.  I loved the graphic interest introduced by the natural onyx's white quartzile streaks.  Being black, this was a great everyday piece for work.  I wore it a lot--or at least I did until it stretched out.


Textile-strung necklaces do stretch out and periodically need restringing. The heavier the beads, the more frequently the necklace will need restringing.  However, on the production side of jewelry-making, you can reduce the frequency your clients' beads need restringing by: 
  1. Using silk.  It has the greatest tensile properties of all the available textiles. FFF-sized silk, for example, has a 15 pound test strength.
  2. Giving your silk thread a really good, thorough, strong tug before using it.  This gets rid of its stretch before you start adding beads. 
  3. Using the right size thread.  The silk should fully fill the bead hole.  What if the bead hole is huge and even FFF-sized thread won't fill it?  String on chain or add more thread! When given the choice I typically prefer to string on silk to keep my beads from knocking together. Thus, when even double-stranded FFF silk won't do the job, I simply start adding more strands of silk until the hole is filled. Usually I don't need to add more than 1-2 strands, but I am perfectly open to adding more if needed.
  4. Make sure your knots are very, very tight.

On the user's end, the need for restringing can be reduced by:
  1. Always storing textile-strung necklaces flat, in a box.  Do not hang the necklace from a hook, as I did with this piece.  The heavier the beads, the  more important it is to follow this advice. 
  2. Never hang heavy objects from the necklace. Small children count as heavy objects.
  3. Keeping the thread dry.  If thread does become wet, lay the necklace flat to dry.  Wait until the silk is completely dry (usually a full day or two) before wearing the necklace again.

Tuesday, October 14, 2014

Tripped up Tuesdays Gets a New Name and a New Schedule

Well, it's open!  After approximately 18 months' build up and prep, Naiad Necklaces is ready for business.  I had a crazy couple of weeks moving to the finish line that was not helped at all by the fact that my day-job hours tripled during the same time period.  I made multiple, multiple mistakes those last 2 weeks--all in the interest of generating fresh material for this column, of course!  The most apparent and painful of my mistakes was vastly underestimating how long it would take to write a single listing.  While I got marginally faster (?sloppier?) as I went along, I averaged 45 minutes for each of my 21 inaugural listings. 

It also became apparent that, even though I have lots and lots of material for this column, I don't have lots and lots of time to write it.  I have therefore decided to rename this column "Mistake of the Month Mondays," with a goal of publishing it on the first Monday of every month. Thanks for stopping by.  I'll see you in a month!

Tuesday, September 23, 2014

Tripped Up Tuesdays: Feeling Uncentered

A slightly off center lapis stone. 
For my first try at bezel setting, this wasn't too bad.  However, you can see that the lapis shifted slightly while I was pushing the bezel sides in.  By the time I noticed, it was too late to fix.


Although I didn't realize it at the time, part of the problem was my tool:

A bezel roller.  Photo courtesy bestjewelrysupply. Ebay user.

This is a fairly standard bezel setter, but I don't have a lot of upper body or hand strength.  Using it, I found that I could only push the bezel sides in a micron at a time.  Typically, you want to firmly push each side of the bezel to form a square that "locks in" the stone.  With my wimpy pushes, I had inadvertently jostled the stone.  I was in a class, and I spent so much time trying to get the first stone set that I took the second bezel and stone home to finish.  Only, I forgot that I didn't have a bezel roller at home.  What I had instead, was this tool:


A used airliner burnishing tool

This tool is a much used burnisher that I purchased on e-bay.  Previously used on airliner innards, it was twice as big as the usual burnisher for sale on e-bay and much too big for my hands--or so I thought. I had nothing else to set the stone, however, so I tried it out.  It was fabulous!  It bent the silver like butter, and I quickly locked the second stone in:
This stone is perfectly centered.  I haven't yet created the rolled edge to give it a finished look
It turns out this large burnisher greatly improved my mechanical advantage.  If you find yourself struggling with bezel rollers, I highly recommend it.  That, and double-checking the position of your stones before it's too late.


Tuesday, September 16, 2014

Tripped Up Tuesdays: Counting beads didn't help these uneven ends

There are literally hundreds of tiny silk knots between each seed pearl in this necklace.  As I laid out the pattern, I carefully counted each bead to keep the pattern and continuously placed the piece on my beading to tray to confirm the design layout.
 
If you look closely, you can see that the coral/turquoise stations "match up" on the beading tray and end at the same length on each side of the tray


Unfortunately, when I went to add the clasp, I saw this:
 
Counting the beads exactly didn't work quite as well as I thought, because each bead is slightly different in size.  I am learning the hard way that jewelry needs to be looked at and measured in multiple dimensions and in multiple ways.  Even two ways isn't enough.  Sure, go ahead and count those beads!  Lay them out in a tray!  But also line the necklace's sides up right next to each other.  Pull the sides taut, and look at them from different angles.

Tuesday, September 2, 2014

Tripped Up Tuesdays: All Gummed Up with Henrietta's Gum Arabic


I love, love, love Henrietta's Gum Arabic, but all too often, I end up wearing the stuff in my lap.  It runs on the spendy side (about $10-$14 per oz) and needs to be mail ordered.  One big spill can result in substantial production delays while I wait for the new stuff to come in.

 
Gum Arabic is a natural gum made from the sap of two Acacia trees: Senegalia senega and Vachellia seyal. Comprised of a natural mixture of edible glycoproteins and polysaccharides, it is used extensively in the food industry as a stabilizer (it reduces the size of bubbles in soda pops) and as a thickener (think gum drops). In watercolor painting, gum arabic acts as a binder, bonding pigments to paper, increasing paints' luminosity, and producing lovely feather effects in water washes.  It is also a weak glue and was the traditional adhesive used on lickable postage stamps and envelopes. One of gum arabic's most remarkable properties is its solubility: it can be completely dissolved in its own volume of cold water. This extreme solubility makes it ideal for beadwork, as spills and dribbles can be easily and completely washed away with just tiny amounts of water. Following Henrietta Virchik, I use the gum to create self-threads of silk and to bind my final knots before sealing.
 
Henrietta Virchik is the author of the classic book, Pearl and Bead Stringing With Henrietta and the developer of Henrietta's Gum Arabic.  After her death in 2001, Henrietta's mentee Suzanne Hye purchased her Beading Supply Company (eventually renaming it "Hye on Beads") and the gum arabic formula. According to Ms. Hye, "I kept [Henrietta's] name on the glue as homage to her. My family continues to make and sell the glue to wholesalers such as Beadsmith and Eurotool." Ms. Hye also sells the glue on e-bay under the name vintagesuzanne, which is where I usually get it.  Ms. Hye's e-bay shop, by the way, is also an excellent source for discontinued Gudebrod silk thread.
 
So what to do about those all-too-common spills?  The jar's wide mouth and relatively high center of gravity make Henrietta's Gum Arabic particularly prone to tipping.  I therefore decided to make a Styrofoam collar to lower its center of gravity.  It was a wonderful inaugural project for my new jeweler's saw!
Just *try* tilting this baby!
Also, if you really get into a pinch, plain old Elmer's glue or painter's gum arabic can be substituted for Henrietta's for considerably lower cost.  Truthfully, any water-soluble glue would work fine for the self-threads.  However, for binding the last knots in a necklace, I recommend using some sort of gum arabic. 


 Tradition and gratitude to Henrietta keep me loyal to her brand, however.  With my new Styrofoam collar, I can now use her gum and not wear it.
 

Tuesday, August 19, 2014

Tripped Up Tuesdays: The Wrong Trousers!


No, it's not because they're my fat pants (well, they are, but that's beside the point).


The problem is here, with the cargo pocket


Not once did Henrietta Virchick mention that cargo pants were a no-go in her classic book on bead stringing.  But take it from me, you want a smooth, form-fitting pant when you are beading.


Monday, August 4, 2014

Tripped Up Tuesdays: Count those chain links!

I swear, swear, pinky swear that I counted these chain links three times before I cut them. It wasn't until I staged this necklace and took some close ups that I figured out why it was twisting.


See the extra link?
Count twice ( or in my case, four times), and cut once.

Tuesday, July 29, 2014

Tripped-Up Tuesdays: Holy Reverse Redox, Batman! How not to use baking soda and aluminum to remove tarnish from silver

With a few exceptions, nothing beats the safety of a bicarbonate/aluminum foil/water bath for removing tarnish from silver.  If you aren't careful however, things can go very wrong:

It started innocently enough:

Several objects covered with baking soda, ready for the hot water bath.

But within moments, this happened:


Notice that several of these sterling beads have actually turned black, not shiny silver!
It turns out there were several potential culprits:


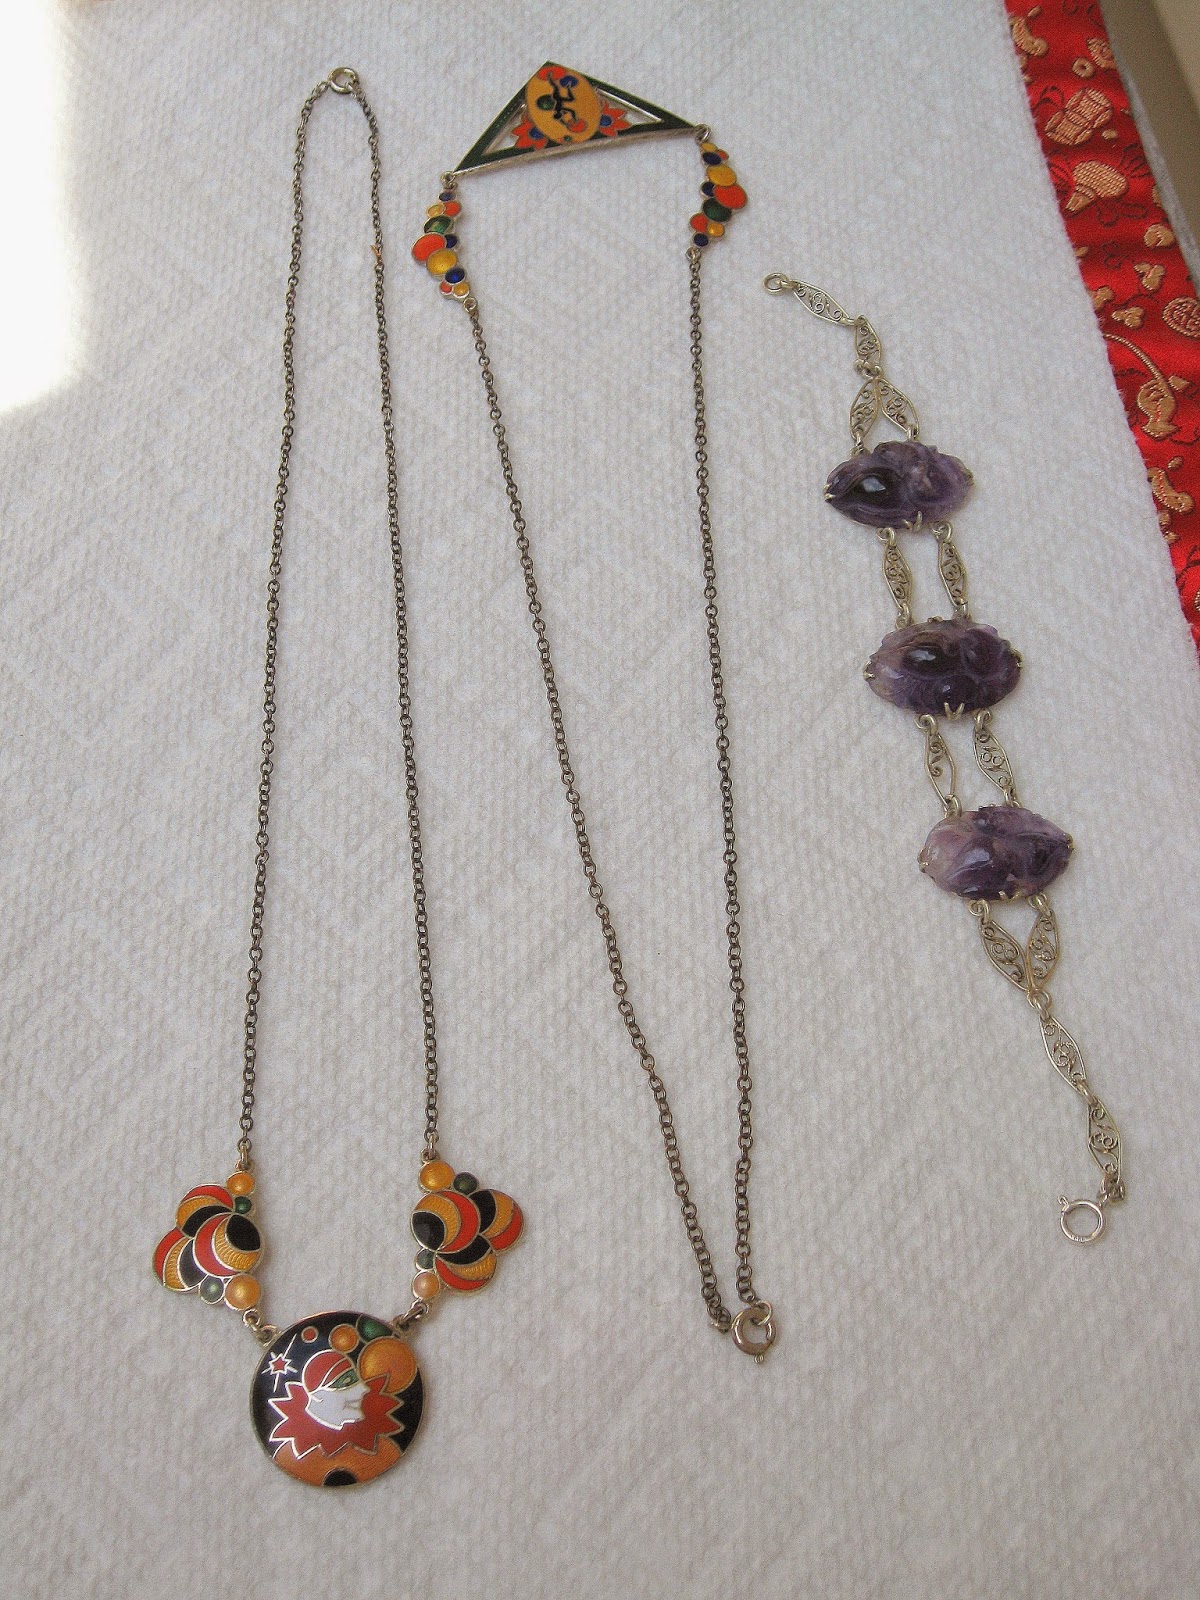
The two Art Deco "Bubble" Necklaces on the left were strung on nickle chain, not silver plate as I had been told by the vendor, and a nickle safety chain had been attached to the amethyst bracelet on the right. In addition, a fourth necklace had been strung on uncoated metal wire of unknown type and crimped with what appeared to be zinc metal.

Tarnish is caused when hydrogen sulfide reacts with surface silver to form silver sulfide. This process can be reversed in a classic redox electrochemical reaction by placing silver (the cathode) in a salt water bath (the baking soda dissolved in water) with a metal that has more affinity for sulfur than silver has (here, aluminum --the anode).  The two metals need to be in contact with one another. The process messed up here because I inadvertently placed a tarnished metal into the bath that actually had less affinity for sulfur than did the silver.  The problem was remedied easily enough--I just needed to repeat my saltwater bath making sure that nothing other than silver and aluminum were in the chemical mix.  I have also started to use this:


A neodymium magnet can be used to detect any unexpected magnetic metals in your jewelry (primarily nickel).  I also now create separate aluminum "boats" for each piece of jewelry so that if the redox reaction does go wrong, it will at least be limited to a single piece.


Tuesday, July 22, 2014

Tripped-Up Tuesday: How not to stage a necklace


Everyone knows that colors side by side on the colorwheel look less intense than when you pair the same color to its opposite or against white. However, I once saw an amethyst pendant photographed against an intense, luminous pinky-purple background, and it looked amazing. I wanted to replicate that look using a tomato-red coral necklace and reflective acrylic (one red, one fluorescent pink). Here are the results:


I think we can all agree this is not the best way to stage a necklace!

Resources:

There are many great resources for learning how to photograph jewelry. My personal favorites are:
  •  Derrick Sutton's "How to Sell Your Crafts Online: A Step-by-Step Guide to Successful Sales on Etsy and Beyond;"
  • Marsha Collier's "E-bay Business All-in-One for Dummies;"
  • and this You-tube link: How to Photograph Jewelry by the Jewelry Making Professor


For the record, none of them suggested using tomato red backgrounds for tomato red necklaces. I especially love the low cost light box suggested by the Professor!


Disclaimer:  I haven't turned on Google AdsSense.  If I recommend it, it's because I *like* it!